[vc_row type=”in_container” scene_position=”center” text_color=”dark” text_align=”left” overlay_strength=”0.3″][vc_column centered_text=”true” column_padding=”no-extra-padding” column_padding_position=”all” background_color_opacity=”1″ background_hover_color_opacity=”1″ width=”1/6″][/vc_column][vc_column column_padding=”no-extra-padding” column_padding_position=”all” background_color_opacity=”1″ background_hover_color_opacity=”1″ width=”2/3″][vc_column_text]
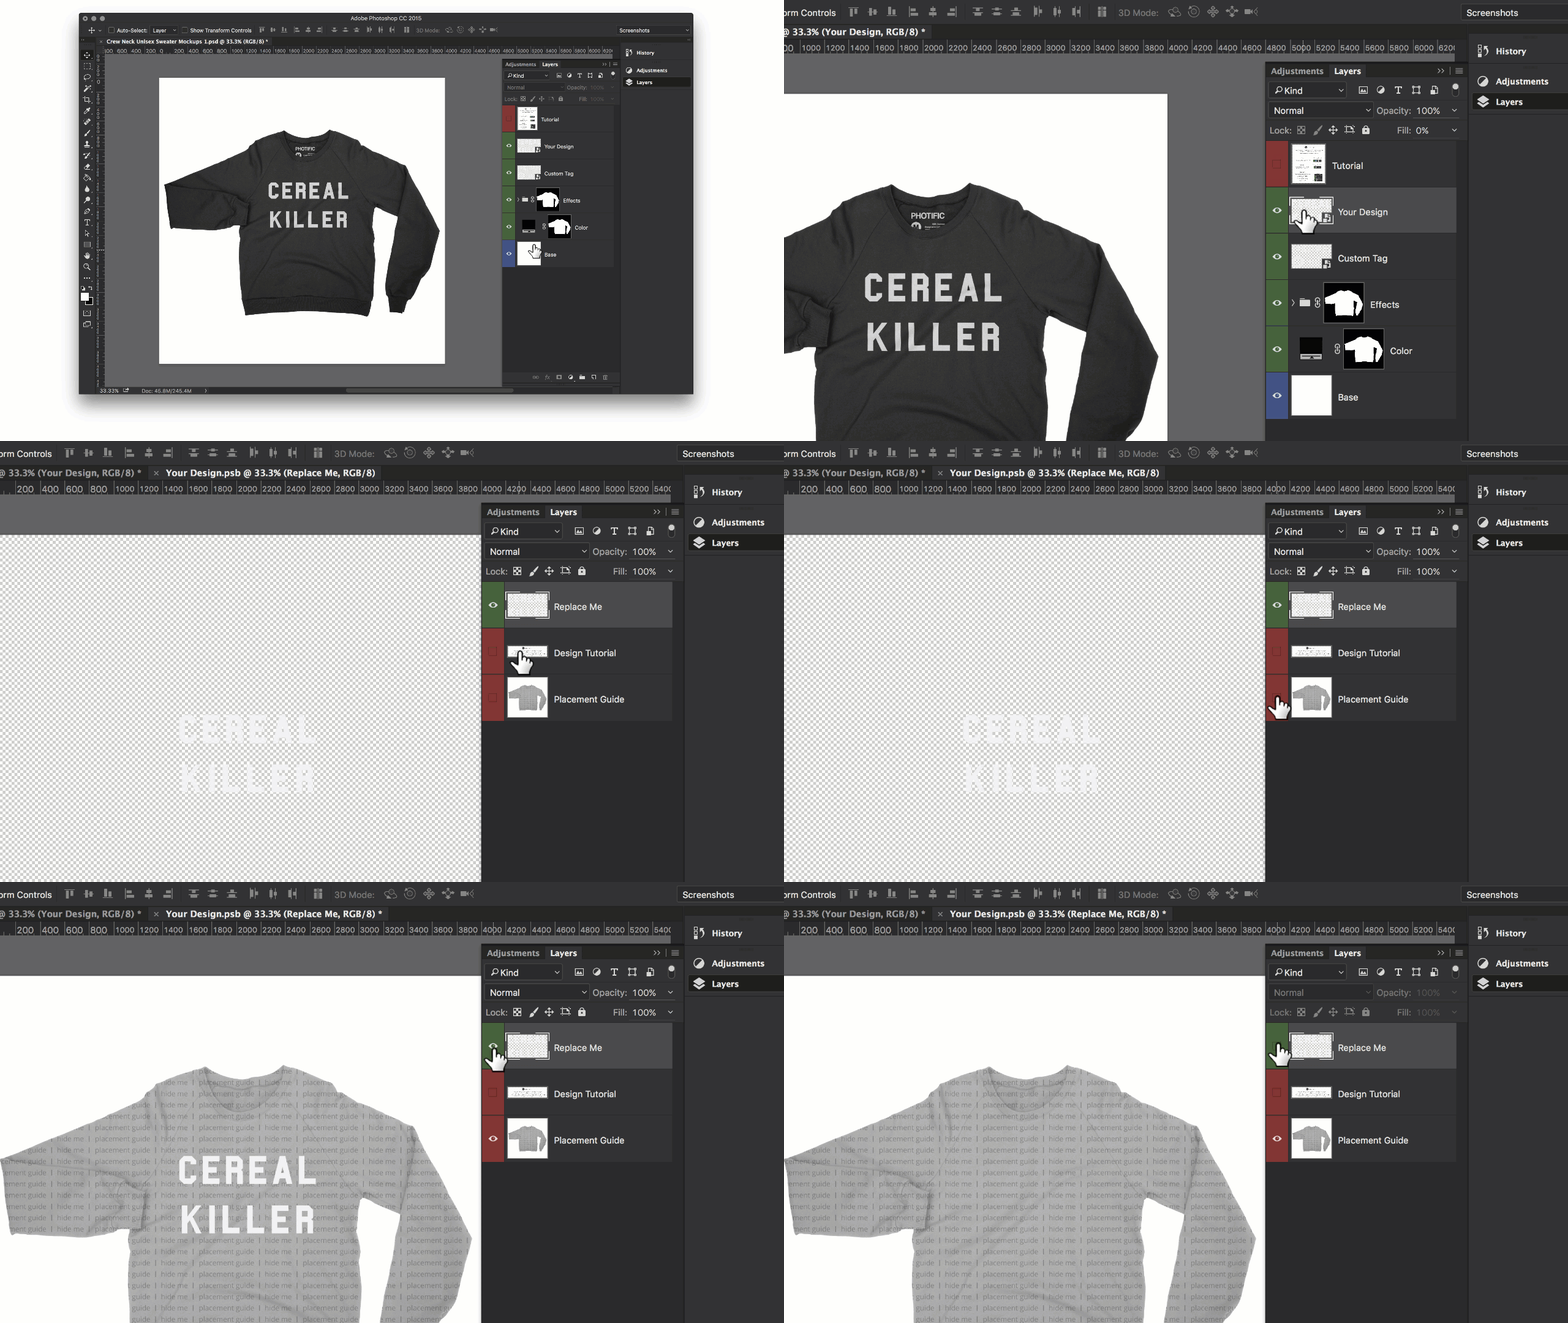
Step 1: Select “Your Design”
Double click the layer “Your Design”. This opens the smart object with the designs inside.
Show the “Placement Guide” and hide layer “Replace Me”.

[/vc_column_text][vc_column_text]
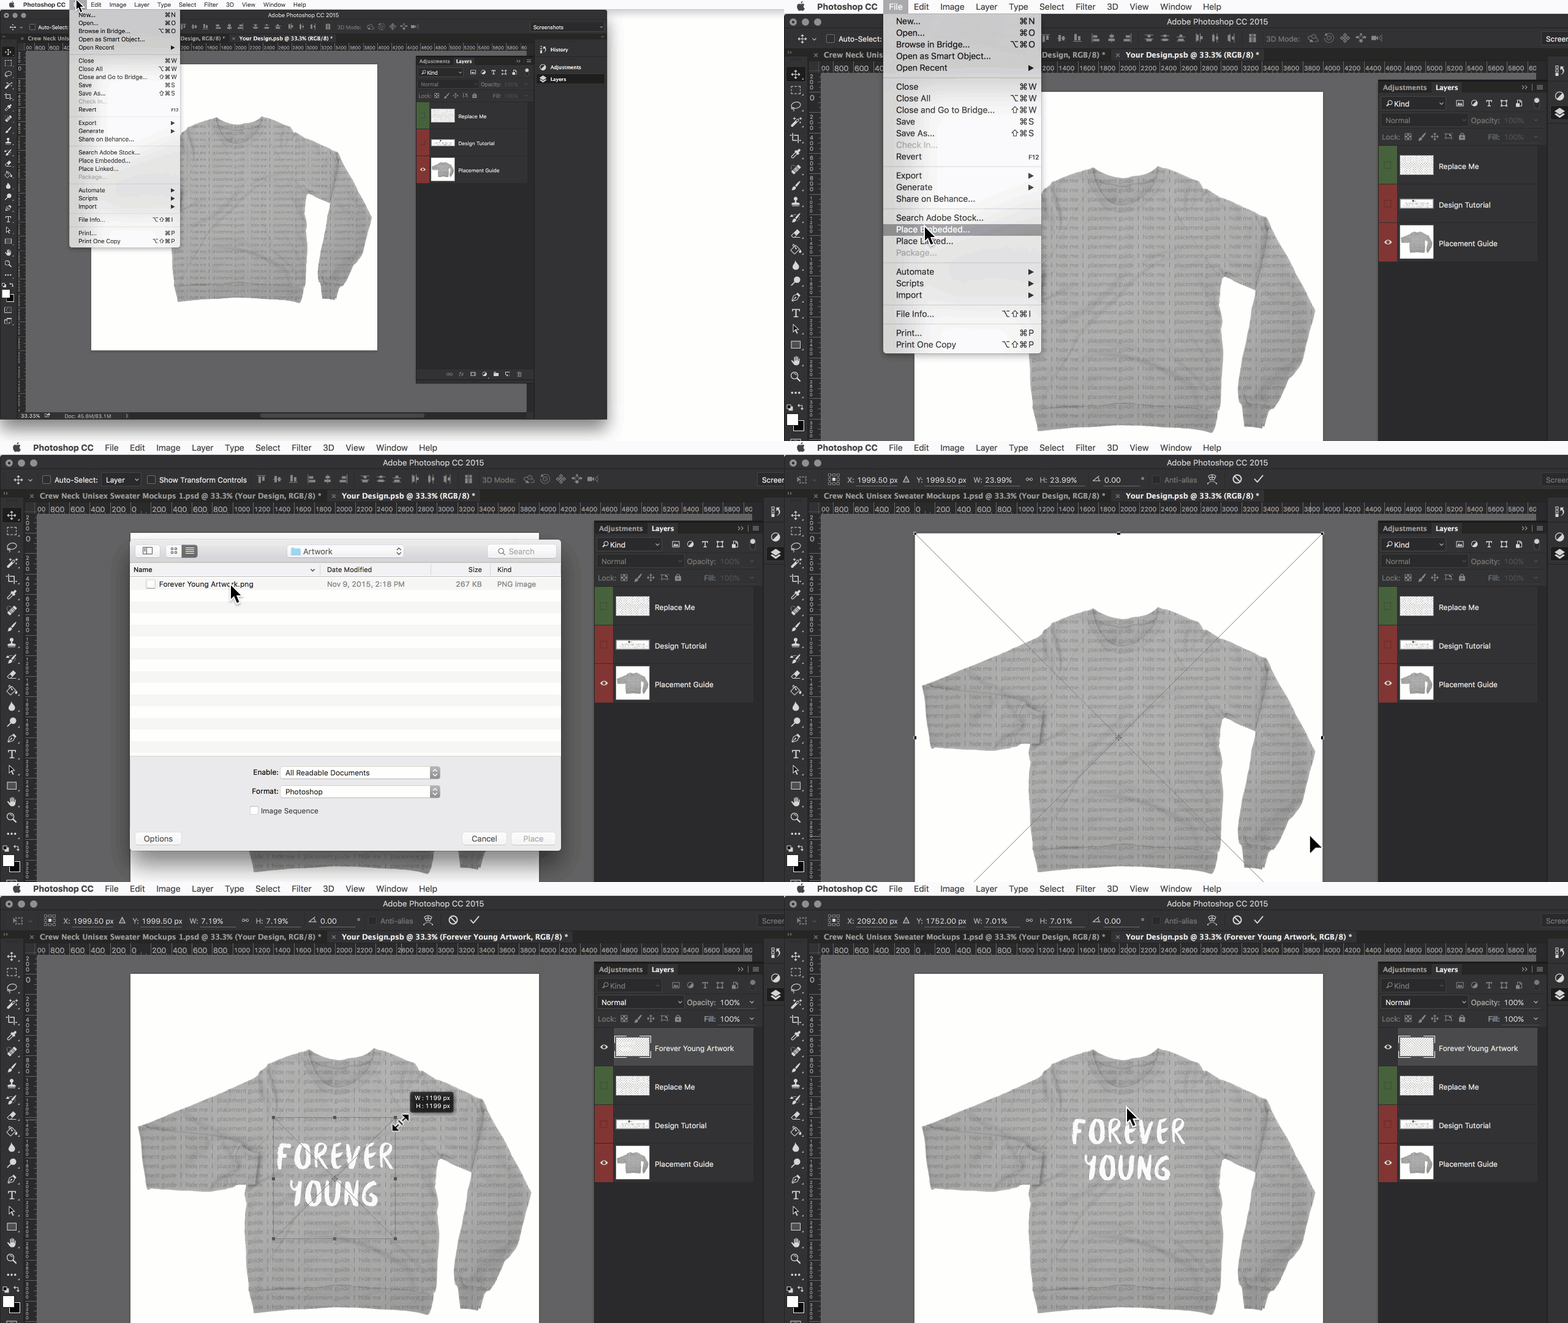
Step 2: Add your artwork
Place your design into the mockup by clicking File > Place Embedded.
(You can also copy-paste artwork from another Photoshop window. Just click Select > All, and then click Edit > Copy)
Position your artwork and hit enter.

[/vc_column_text][vc_column_text]
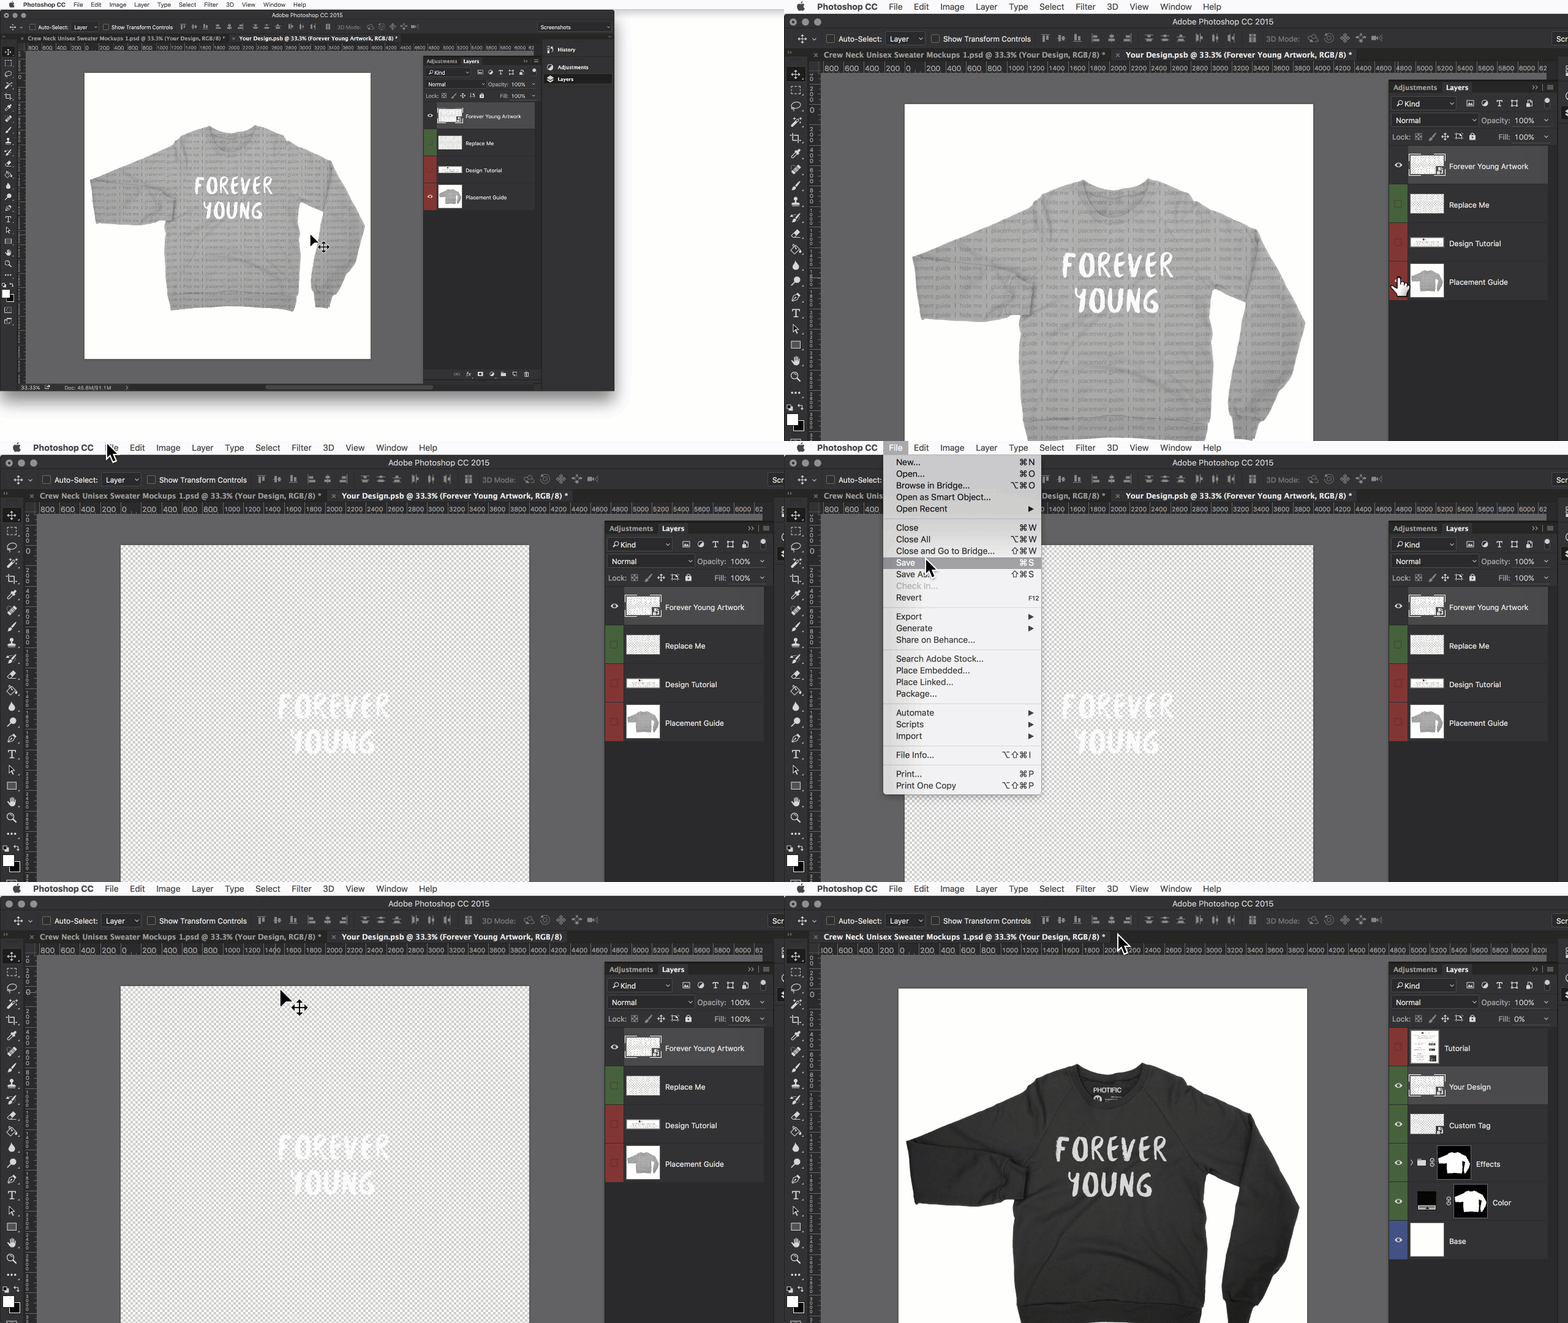
Step 3: Hide “Placement Guide” + Save
Hide the placement guide, then click save. You can close the “Your Design” tab now.

[/vc_column_text][vc_column_text]
That's it! Have fun :).
[/vc_column_text][/vc_column][vc_column column_padding=”no-extra-padding” column_padding_position=”all” background_color_opacity=”1″ background_hover_color_opacity=”1″ width=”1/6″][/vc_column][/vc_row]


