[vc_row type=”in_container” full_screen_row_position=”middle” scene_position=”center” text_color=”dark” text_align=”left” overlay_strength=”0.3″ shape_divider_position=”bottom” bg_image_animation=”none”][vc_column column_padding=”no-extra-padding” column_padding_position=”all” background_color_opacity=”1″ background_hover_color_opacity=”1″ column_link_target=”_self” column_shadow=”none” column_border_radius=”none” width=”1/1″ tablet_width_inherit=”default” tablet_text_alignment=”default” phone_text_alignment=”default” column_border_width=”none” column_border_style=”solid” bg_image_animation=”none”][divider line_type=”No Line” custom_height=”50″][vc_column_text]
The way we create ultra-realistic mockup files can sometimes leave white garments and designs looking a little grey. Luckily there's an easy way to make whites pop while keeping the photo-realism.
[/vc_column_text][divider line_type=”No Line” custom_height=”30″][/vc_column][/vc_row][vc_row type=”in_container” full_screen_row_position=”middle” scene_position=”center” text_color=”dark” text_align=”left” overlay_strength=”0.3″ shape_divider_position=”bottom” bg_image_animation=”none”][vc_column centered_text=”true” column_padding=”no-extra-padding” column_padding_position=”all” background_color_opacity=”1″ background_hover_color_opacity=”1″ column_link_target=”_self” column_shadow=”none” column_border_radius=”none” width=”1/6″ tablet_width_inherit=”default” tablet_text_alignment=”default” phone_text_alignment=”default” column_border_width=”none” column_border_style=”solid” bg_image_animation=”none”][/vc_column][vc_column centered_text=”true” column_padding=”no-extra-padding” column_padding_position=”all” background_color_opacity=”1″ background_hover_color_opacity=”1″ column_link_target=”_self” column_shadow=”none” column_border_radius=”none” width=”2/3″ tablet_width_inherit=”default” tablet_text_alignment=”default” phone_text_alignment=”default” column_border_width=”none” column_border_style=”solid” bg_image_animation=”none”][vc_column_text]
Add Brightness to Garments
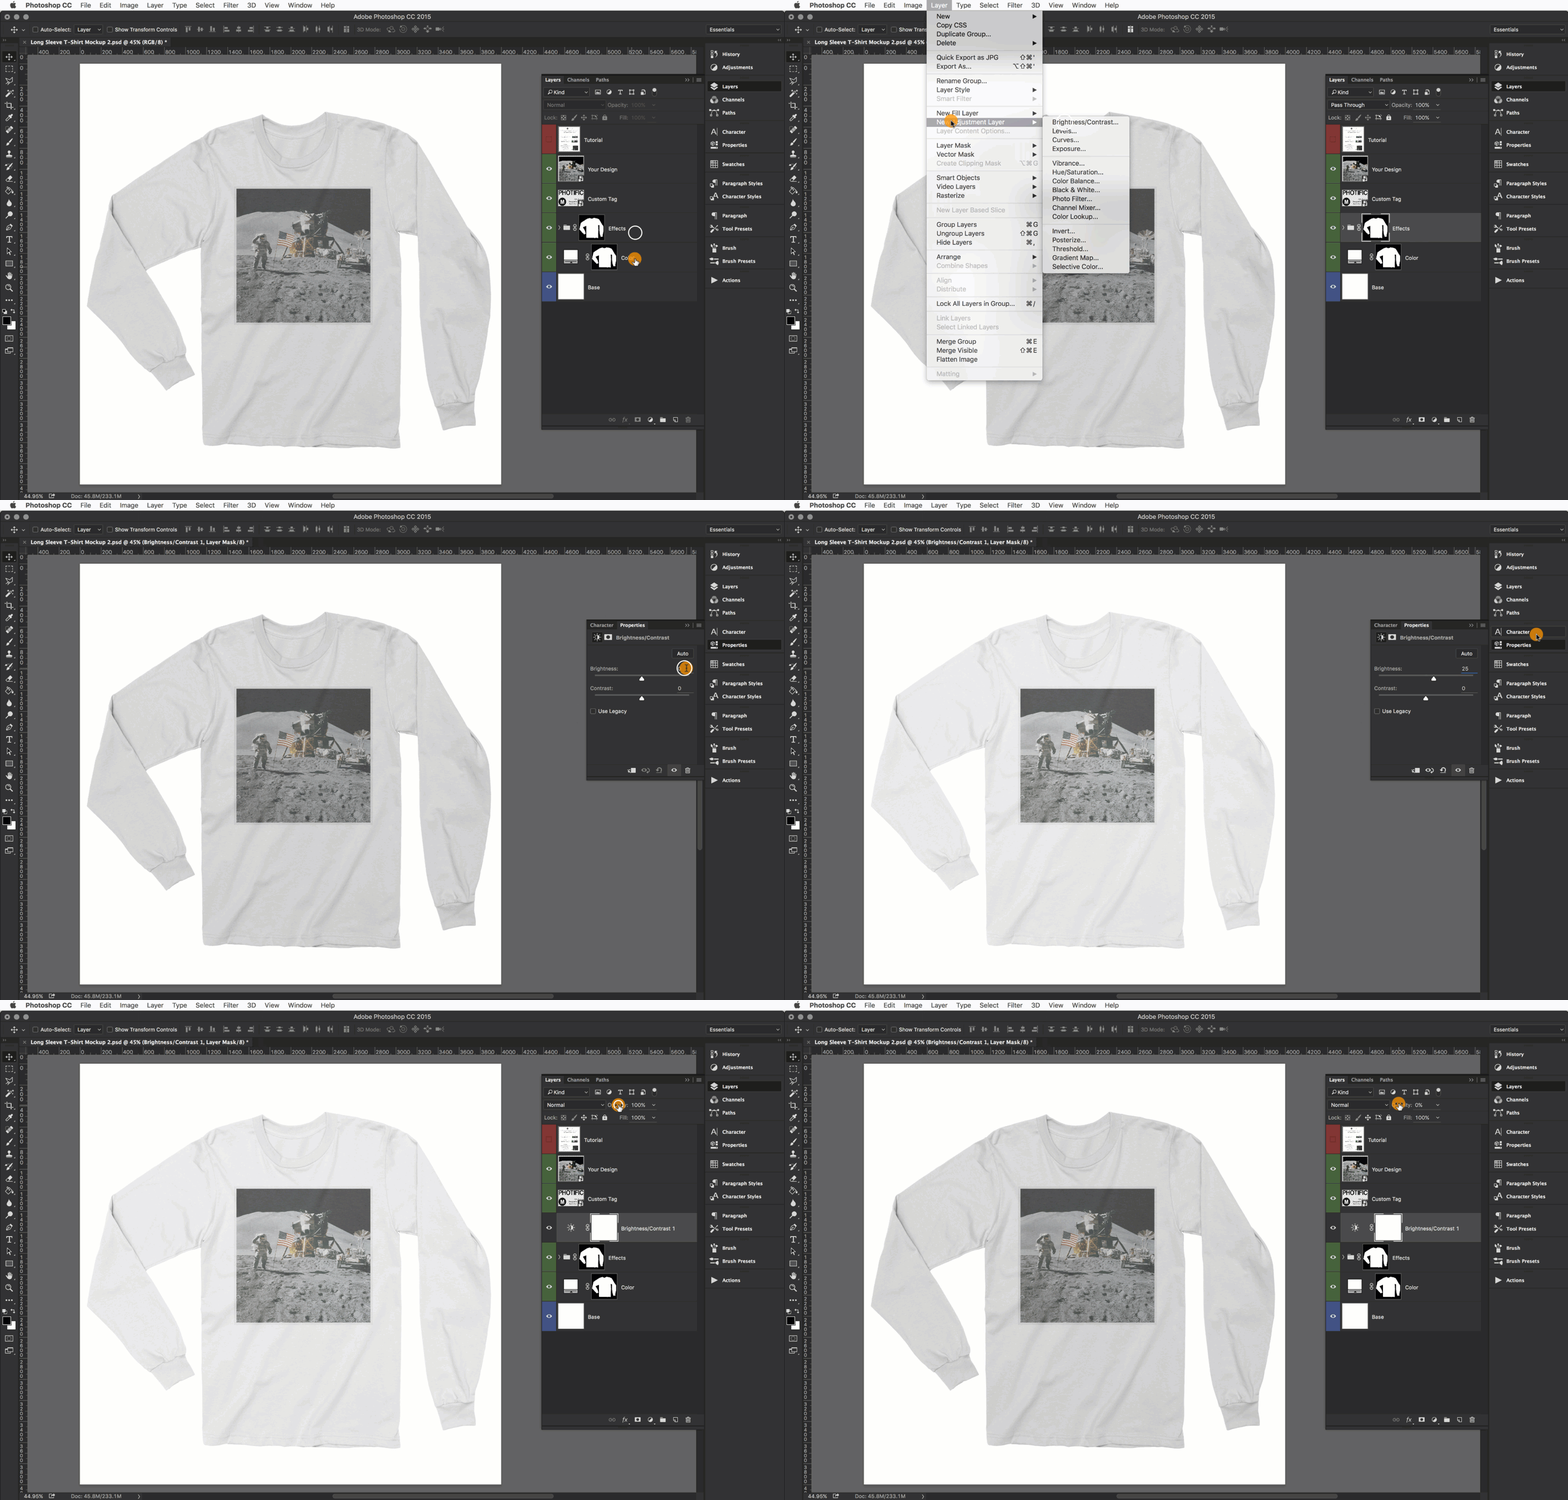
Select the effects layer
Click: Layer > New Adjustment Layer > Brightness/Contrast
Set the layer brightness to 25
Adjust the brightness layer opacity to modify the effect

[/vc_column_text][divider line_type=”No Line” custom_height=”30″][vc_column_text]
Only Add Brightness to the Design
If you're using a garment that isn't white and you only want to add brightness to the design follow these steps:
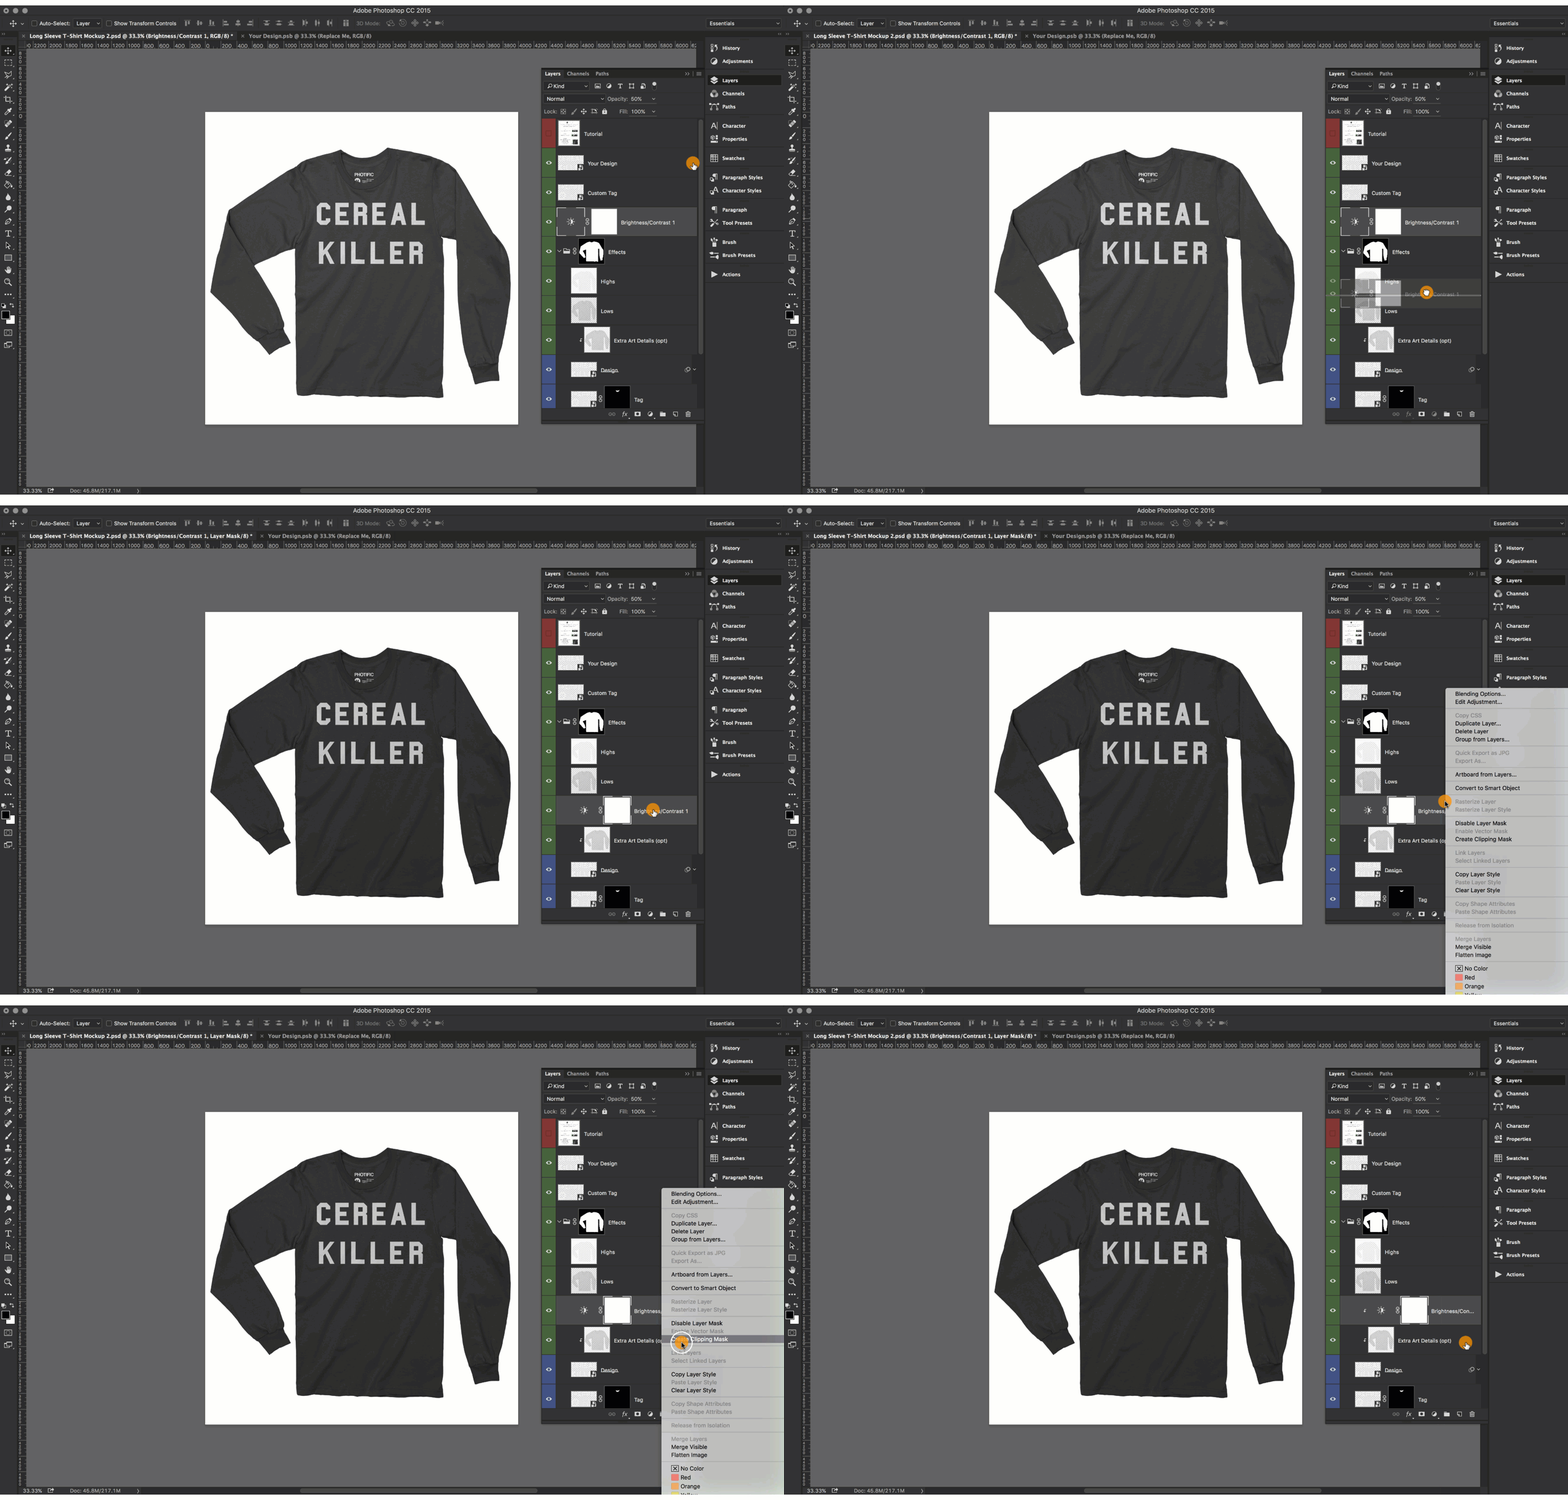
Select the Brightness/Contrast layer from the previous step
Move the layer above the extra art details layer (make sure the extra art details layer isn't hidden)
Right click the Brightness/Contrast layer and select “Create Clipping Mask”
You can increase the brightness level of the adjustment for a greater effect

[/vc_column_text][/vc_column][vc_column column_padding=”no-extra-padding” column_padding_position=”all” background_color_opacity=”1″ background_hover_color_opacity=”1″ column_link_target=”_self” column_shadow=”none” column_border_radius=”none” width=”1/6″ tablet_width_inherit=”default” tablet_text_alignment=”default” phone_text_alignment=”default” column_border_width=”none” column_border_style=”solid” bg_image_animation=”none”][/vc_column][/vc_row]


